Introduction to Cake Pop
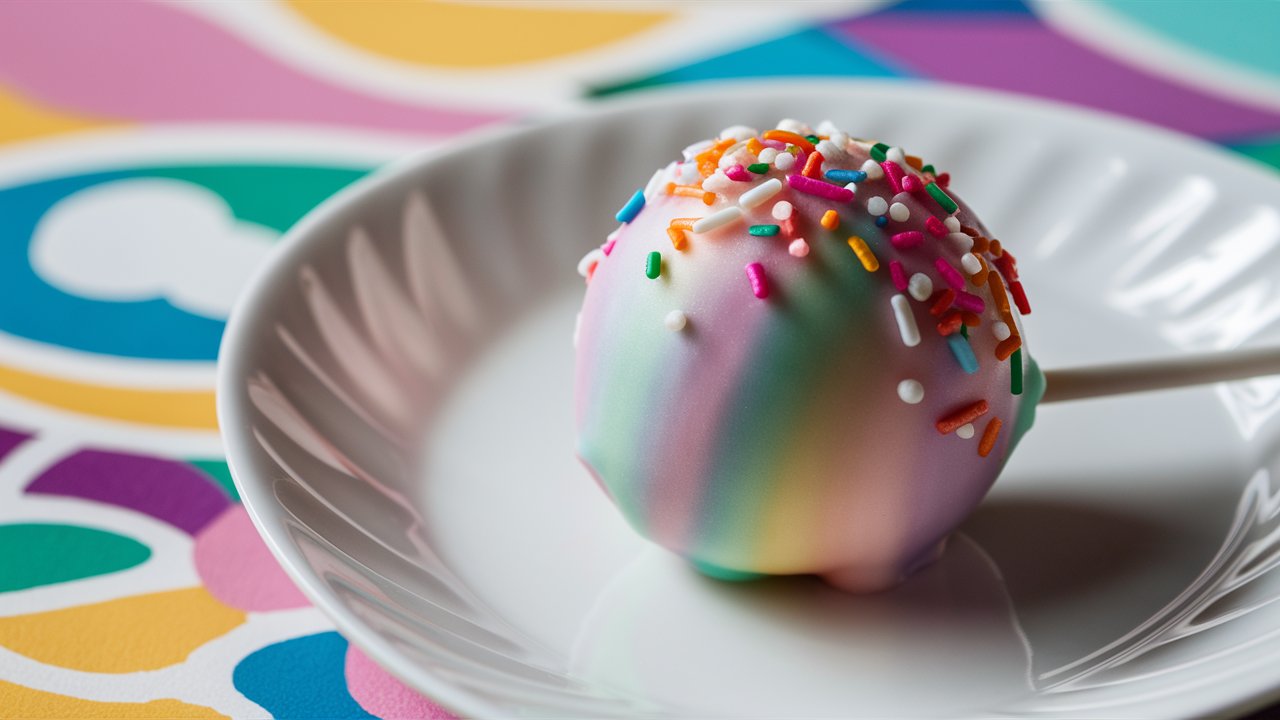
Cake pop recipe is delightful, bite-sized treats that combine the delicious flavors of cake and frosting in a convenient, portable form. These charming confections are made by crumbling cake, mixing it with frosting, and shaping the mixture into small balls. The cake balls are then attached to sticks, coated with a layer of chocolate or candy melts, and decorated with sprinkles, drizzles, or other toppings.
The popularity of cake pop recipe has surged over the past few years, thanks to their whimsical appearance and versatility. They offer a fun and creative way to enjoy cake and are perfect for parties, celebrations, and gifts. Cake pop recipe is especially appealing because they can be customized to suit any occasion, from weddings to birthday parties, and can be made in a variety of flavors and designs.
This article will provide a comprehensive guide to making cake pop recipe at home. It will cover the essential ingredients and equipment needed, step-by-step instructions for creating the perfect cake pop recipe texture, and tips for decorating them with flair. Whether you’re a beginner or an experienced baker, you’ll find helpful advice and creative ideas to inspire your cake pop creations. Get ready to impress your friends and family with these delightful treats!
What Are Cake Pop ?
Cake pops are small, round confections made from crumbled cake mixed with frosting, formed into balls, and mounted on sticks. They are then dipped in a coating of chocolate or candy melts and decorated with various toppings like sprinkles, drizzles, or edible glitter. These delightful treats offer a unique way to enjoy the flavors of cake in a convenient, bite-sized form.
The concept of cake pops was popularized by blogger Bakerella in 2008, who shared creative designs and recipes that quickly gained popularity online. Cake pops have since become a trendy dessert choice due to their visual appeal and versatility.
Cake pops are a popular dessert choice because they combine the delicious taste of cake with the convenience of a handheld treat. Their customizable nature allows them to be tailored to fit any occasion or theme, making them a favorite for parties, weddings, and celebrations. Additionally, their charming appearance and variety of flavors make them an irresistible option for dessert lovers of all ages.
Ingredients Needed for Cake Pops
Making cake pops at home requires a few essential ingredients, including the cake base, frosting, and various coating and decoration options. Here’s a detailed guide to what you’ll need:
Essential Ingredients List
- Cake Base Ingredients
- Flour: All-purpose flour is commonly used, but you can substitute with gluten-free or other specialty flours.
- Sugar: Granulated sugar is standard, but brown sugar can add moisture and flavor.
- Eggs: These provide structure and richness to the cake.
- Butter or Oil: Adds moisture and flavor. Use unsalted butter or a neutral oil like canola.
- Baking Powder/Soda: Essential for leavening.
- Milk or Buttermilk: Adds moisture and a tender crumb.
- Frosting Ingredients
- Butter: Unsalted butter is best for controlling the flavor.
- Powdered Sugar: For sweetness and a smooth texture.
- Vanilla Extract: For flavor. You can also use almond or other extracts for variation.
- Milk or Cream: To adjust the consistency.
- Coating and Decoration Options
- Chocolate or Candy Melts: Used for dipping. White, milk, or dark chocolate can be used depending on preference.
- Sprinkles, Nuts, or Coconut Flakes: For decorating the pops.
- Food Coloring: To tint the candy melts or frosting.
Variations for Different Flavors
- Chocolate Cake Pops: Use cocoa powder in the cake base and chocolate frosting.
- Lemon Cake Pops: Add lemon zest and lemon juice to the cake and frosting.
- Red Velvet Cake Pops: Use cocoa powder and red food coloring in the cake base.
Tips on Selecting Quality Ingredients
- Flour and Sugar: Choose fresh, high-quality brands for better flavor and texture.
- Butter: Use high-quality, unsalted butter for the best taste.
- Chocolate: Select high-quality chocolate or candy melts to ensure a smooth coating.
- Flavorings: Opt for pure extracts rather than artificial ones for a richer flavor.
By using quality ingredients, you’ll ensure your cake pops are not only delicious but also visually appealing and satisfying.
Tools and Equipment
To make cake pops, you’ll need a few essential tools:
- Necessary Tools:
- Cake pop sticks
- Electric mixer or hand mixer
- Baking sheet
- Mixing bowls
- Spoon or spatula
- Styrofoam block or cake pop stand
- Measuring cups and spoons
- Optional Tools for Advanced Decoration:
- Piping bags and tips
- Food coloring
- Edible glitter or dust
- Specialty sprinkles and edible decorations
Step-by-Step Cake Pop Recipe
Making the Cake Base
To start, you’ll need a simple cake base. Here’s a recipe for a vanilla cake:
- Ingredients:
- 1 cup all-purpose flour
- 1/2 cup sugar
- 1/4 cup unsalted butter, softened
- 1/2 cup milk
- 1 teaspoon vanilla extract
- 1 egg
- 1 teaspoon baking powder
- 1/4 teaspoon salt
- Instructions:
- Preheat your oven to 350°F (175°C) and grease a baking pan.
- In a mixing bowl, cream the butter and sugar together until light and fluffy.
- Add the egg and vanilla extract, mixing well.
- Gradually add the flour, baking powder, and salt, alternating with milk, until combined.
- Pour the batter into the prepared pan and bake for 25–30 minutes or until a toothpick inserted in the center comes out clean.
For alternatives, you can use a chocolate or red velvet cake mix.
Preparing the Frosting
For a basic vanilla buttercream:
- Ingredients:
- 1/2 cup unsalted butter, softened
- 2 cups powdered sugar
- 1 teaspoon vanilla extract
- 2 tablespoons milk
- Instructions:
- Beat the butter until creamy.
- Gradually add the powdered sugar, mixing until smooth.
- Stir in the vanilla extract and milk until the desired consistency is achieved.
You can adjust the flavor by adding cocoa powder for chocolate frosting or other extracts like almond or lemon.
Forming the Cake Pop recipe
- Crumble the Cake:
- Once the cake has cooled, crumble it into fine pieces in a large bowl.
- Mix with Frosting:
- Start by adding 2–3 tablespoons of frosting to the crumbled cake. Mix thoroughly with your hands until the mixture holds together.
- Check Consistency:
- The mixture should be moist but not too sticky. Add more frosting if needed.
- Roll into Balls:
- Use a small cookie scoop to portion out the mixture, then roll into uniform balls with your hands. Place on a baking sheet lined with parchment paper.
Coating and Decorating
- Melt the Coating:
- Use chocolate or candy melts in a microwave-safe bowl. Heat in 30-second intervals, stirring until smooth.
- Dipping Technique:
- Dip the tip of each cake pop stick into the melted coating, then insert it halfway into a cake ball. This helps secure the stick.
- Once the sticks are in place, chill the cake pops for 15 minutes.
- Dip and Decorate:
- Fully dip each cake pop into the melted coating, gently tapping off any excess.
- Immediately add sprinkles or other decorations before the coating hardens.
Tips and Tricks for Perfect Cake Pop recipe
- Common Mistakes to Avoid:
- Ensure the cake is completely cooled before crumbling to avoid a mushy texture.
- Don’t overheat the chocolate coating, as this can cause it to become too thick.
- Troubleshooting Tips:
- If the coating cracks, try adding a small amount of shortening or oil to thin it out.
- Allow cake pops to come to room temperature before dipping to prevent cracks.
- Storage and Make-Ahead Tips:
- Store cake pops in an airtight container in the refrigerator for up to a week.
- To make ahead, freeze uncoated cake pops and dip them on the day you plan to serve them.
Creative Variations and Ideas
- Fun Flavor Combinations:
- Try mixing different cake and frosting flavors, like lemon cake with cream cheese frosting or chocolate cake with peanut butter frosting.
- Seasonal and Themed Cake Pops:
- Create themed cake pops for holidays by using colored coatings and decorations, such as orange and black for Halloween or red and green for Christmas.
- Presentation and Serving Ideas:
- Display cake pops in a decorative stand or vase filled with colorful candies.
- Wrap individual cake pops in clear bags tied with ribbons for party favors.
FAQs About Cake Pops
- Can I freeze cake pops?
- Yes, uncoated cake pops can be frozen for up to three months. Thaw before dipping.
- How do I prevent the chocolate coating from cracking?
- Ensure the cake balls are at room temperature before dipping and avoid extreme temperature changes.
- Can I use different types of chocolate for coating?
- Yes, you can use white, milk, or dark chocolate. Add a bit of shortening if the chocolate is too thick.
- How long do cake pops last?
- Cake pops can last up to a week in the refrigerator or three days at room temperature.
Conclusion
Making cake pops at home is a fun and rewarding activity. By following this guide, you’ll be able to create delicious and visually appealing cake pops that are perfect for any occasion. Remember to experiment with different flavors and decorations to make your creations unique. Share your cake pops with friends and family, and enjoy the delightful process of crafting these sweet treats. Don’t hesitate to share your creations on social media and inspire others to try their hand at making cake pops!